How I Built This Website
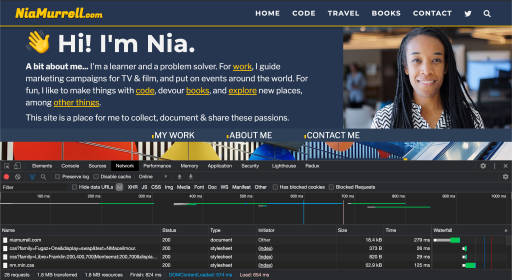
Introducing the New NiaMurrell.com 🎊
June 30, 2020⭐️ FEATURED
41 days ago on May 20 I set a deadline for myself to finish the redesign of this website by the end of June. Today being the last day of the month, I’m so excited to say…I did it! 🎉🎉🎉
It goes to show that setting a deadline really works: I had started the project back in October, did some bits and bobs, and then pretty much let it sit untouched from November to the beginning of May.
But it wasn’t something I wanted to be working on forever (there are other projects to make!), so I gave myself about 6 weeks before I must move on. And since I don’t like leaving things unfinished, this was exactly the push I needed to get it done.
Table of Contents
- Why A New Site?
- The First Site Was Really Really Bad!
- Project Goals
- How I Did It
- The Results - HUGE Improvements! (skip to here for some WOW 🤩)
- Future Work
Why A New Site?
The purpose of this project was to combine two sites into one:
- niamurrell.com, which I’d hand-coded page by page 4+ years ago, before I knew anything about modern web development
- and dev.niamurrell.com, the coding blog I use a lot. I really liked the workflow of updating this site, but I hadn’t designed it from scratch.
It didn’t really make sense to me to have two separate personal sites after a while, but because of the atrocious code of the first site, blending the two was a big undertaking.
It’s also important to note that both sites had been adapted from themes I’d found on the web…Fekra and Project Pages respectively. Project Pages is in itself a fork from the Clean Blog theme, so needless to say there was a lot of code bloat in my site’s repo.
And I’m a developer now! In the time since I made both sites, I’d learned a lot about how to build a site from scratch, so of course I should do this for my own website.
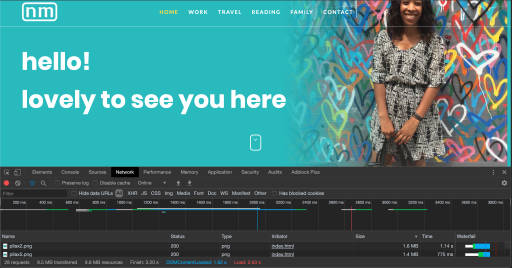
The First Site Was Really Really Bad!
Can I just take a moment to highlight all of the things I didn’t know when I made niamurrell.com. 😆 The list below is a glimpse at why I so desperately needed to re-do the site:
- The images were all
.pngfiles (“for the best quality” according to my ignorant logic 😂), some as big as 10MB!!!! - While the site was responsive, I’d edited the images in a way that they weren’t even visible on small devices
- Each page was written in vanilla HTML. That nav bar? I copied & pasted it into each file…don’t even ask about the sidebar with the “latest” posts… 🤦🏾♀️🤦🏾♀️🤦🏾♀️
- There was no way to add new content without coding a whole new HTML document from scratch. Even doing that, then I’d need to update all the other pages to incorporate it 😭
To my credit, when I made this site it was a step in the right direction; the previous site was a Wordpress installation which had been irreversibly hacked, and at least this one was unhackable static pages being cached by CDN. Baby steps!
Project Goals
So all of this in mind, I set some goals & guidelines for the new project:
- Incorporates all my writing into one place, but still allows for different verticals (travel, coding, etc.)
- Super-performant page loading and no code bloat
- No themes or templates—my own design (to be fair, I use that word lightly…I’m far from a designer! 😆)
- Totally responsive & makes the best use of space on any device
- Follows best practices for accessibility
- Flexible for future growth i.e. adding new types of content, or whatever
- Minimal JavaScript
- As little as possible (ideally zero) 3rd party code…no Google Analytics
- Dead easy to add content and maintain
How I Did It
Those are some big goals! Probably why I dragged my heels a bit in the beginning. 😊 But let’s get into the actual implementation…
Static Site Generator - Hexo
Hexo is a Node.js-powered static site generator that lets me write page templates and components in EJS, and then compiles all of my content into the hundreds of vanilla HTML pages that make up the site. Because I write the templates, a change in one component will be updated everywhere automatically, rather than changing every file. New content can be written in Markdown, and it gets fed into the templates.
I prefer to serve the files this way because it’s super fast, the output is standard across all browsers (with or without JS turned on), and it doesn’t require me to manage a database or write an API. And while the Hexo documentation leaves something to be desired (it’s a B- at best!), I’ve used it before and am comfortable with its quirks.
Design
Design is a skill I’m still developing, but I’m happy with how it turned out on this site. While I didn’t use any design software, I did take the time to sketch out my pages on paper before coding them which really helped provide some direction as I went along.
I designed each page mobile-first and incorporated everything I know about semantic HTML elements and page order. I used CSS Grid to move elements around as the viewport gets bigger. I tried to minimize distractions from the content with a simple side bar…and you can hide it if you really don’t like it!
One topic that was fun to explore was typography. I limited the text to what I hope is a comfortable line length and made adjustments to the line height & letter spacing in my text and headlines. I also finally got the chance to incorporate fluid font sizing thanks to the Utopia fluid type scale CSS generator. This was really interesting to learn about.
I also tried my hand at creating my own color palette which I had just started learning about when when I first started the site:

Lastly, I used some great tools like favicon.io to make my custom favicon, Undraw for some infrequently used illustrations, and this SVG generator to create the little wave elements I have scattered around the site.
Syntax Highlighting
This is relevant to design, but I think deserves its own section. Hexo supposedly uses highlight.js for its syntax highlighting, but I think the docs are missing some configuration step which I had never figured out in my old blog, and couldn’t figure out in this one. It gives all the necessary classes in the HTML output, but for whatever reason they were never being styled correctly, even with hljs turned on.
So I made my own syntax highlighter! I borrowed the default Hexo theme’s Stylus code and updated it with the colors from Atom One Dark to emulate my VS Code theme. Then I added and tweaked the code in my own highlight playground to see how it would look on code snippets from old blog posts. CodePen will compile the Stylus code for me, so I didn’t need to add an extra build step into my code base.
CSS Modules (speaking of the build…)
I wrote my CSS in small modules to simplify things, and used Grunt to generate a minified CSS file. I’ve already written about this in detail.
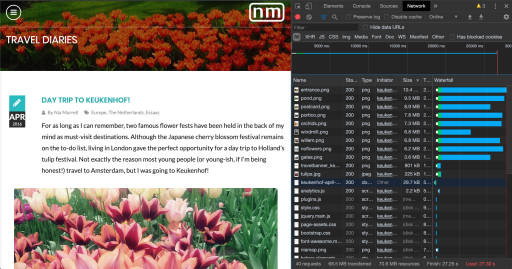
Responsive Images
A huge contributor to the download size of pages on my old blog was not having optimized images.
My solution was to serve different image files depending on the size of the device by using a mix of picture elements and the image srcset attribute. I had never done this before, so it was another great thing to learn about.
I briefly considered editing the images myself and storing all of the image versions with my own codebase but blahhhhh who wants to do that. It would definitely break the “dead easy to add content” rule!
So I opted to use Cloudinary to host my photos instead. (If you sign up using this link, I’ll get some free credits!) With Cloudinary I can just upload one high res image in any file format, and it will create down-scaled images on the fly, right-sized for the device requesting the image. It serves them from a CDN so load time has never been an issue either.
Custom Code Snippets
One useful feature Hexo doesn’t support is the use of _includes (aka components) in markdown, so I had to make my own in a way. The travel posts in my old blog included clickable photo modals as a way to share images that are descriptive but perhaps less impactful than a post’s main images (like this! ). I also sometimes include YouTube videos; I prefer to use YouTube’s nocookie URLs but the default Hexo plugin for YouTube doesn’t generate these.
So for these bits, it was necessary to include HTML in my markdown files. But to make it as easy-to-use as possible, I added these HTML blocks to my VS Code User Snippets…now I can just type hvid + Tab and the code is generated for me (just need to replace the VIDEOCODE):
<div class="post__video-container"> |
Or climg for an image hosted on Cloudinary:
<figure class="post__captioned-image"> |
The tab settings in the code snippet make this simple to use—after expanding this snippet I paste the Cloudinary image path and it will replace all instances of VERSION PATH in one go. The different URLs are how you instruct Cloudinary what size image to respond with.
Analytics
I really wanted to drop Google Analytics from my site. I’m not a big fan of how much data Google collects about people in general, so why should I contribute to it? Not to mention, I have a feeling a good number of the people who come to this site for dev posts will have it blocked anyway.
While we’re on the topic, I chose not to include things like my Twitter timeline for the same reason. I want the site to be as tracker-free as I can make it.
That said I really do like seeing which pages get the most visitors, purely for my own entertainment 😁 I looked into a few privacy-conscious analytics providers but they were all either paid or required me to host them on my own server…fair enough for a useful product but not really worth it for personal entertainment. What happened to the simple web counters of yore!?
I was nearly set on hosting the site with Netlify because they rolled out server analytics relatively recently, meaning I could see which pages got the most hits without adding any JavaScript trackers to my site. A bit of a downer to see the pricing had gone up from $5/month to $9/month in the short time since they launched it though! And this review highlighted some of its not-so-great aspects.
I started looking into my existing set up on AWS to see how I would even move the site over and lo and behold! 🤯 CloudFront already gives me this data and I didn’t even realize it 🥳🥳🥳 The light bulb came from this article, where I learned that CloudFront Analytics will tell me:
- The 50 most popular objects requested
- The top 25 traffic referrers
- Which devices, browsers, and countries are making requests
All of which has cost me no more than $0.20/month in the 2+ years I’ve had both sites being delivered through CloudFront.
It also tells me the pages people are requesting but getting 404 errors from…it’s mostly bots looking for hackable wp-admin.php entries, but I did uncover some pages I’d messed up. So it’s also useful!
Come to think of it, all of the features I get with CloudFront are exactly what Netlify offers—which makes sense, as I’m pretty sure Netlify is a friendly wrapper around AWS services that you could configure yourself if you don’t mind headaches. But in this case it worked out in my favor!
Deployment
Last but not least, the final step!
I host the files in an AWS S3 bucket which is configured as a static website. To serve the files over HTTPS, AWS requires a CloudFront distribution, which gives the added benefit of their global CDN. So I’m serving really small files, really quickly.
I had this setup for the old niamurrell.com, so didn’t have to go through the process of setting my my DNS records again, just had to add the new files…great!
For ongoing ease, I wrote a script which deploys the site when I write a new post:
# add today's blog post & deploy to site |
This script is in my bash prompt and accessible from any Terminal window, including my code editor’s. Let’s break this down:
npm run grunt: Minimize the CSSgit add -A: Stage all changesgit commit -m "Add today's post": Commit…I don’t have to write a commit messagegit push: Push entire site to GitHubhexo g: Generate the static directoryaws s3 sync ...: Update any changed pages in the S3 bucketaws cloudfront ...: Invalidate all cached files so changes are immediately available
Admittedly this invalidation may not be the best solution (as I wrote about last week) but I’m still going with it for now.
🥵 Job Done!
And that’s it! 6 weeks coding, learning, and optimizing and the site is now live.
Should be good for a few years at least, until I realize how much I don’t know right now, and “need” to fix it again in the future! 🤣
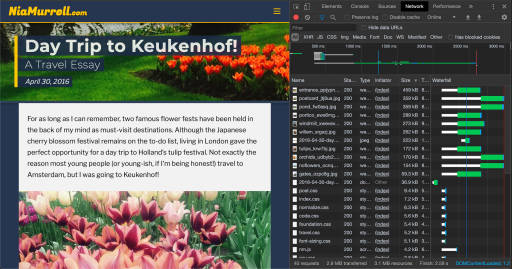
The Results - HUGE Improvements!
I barely even have words for this…still gobsmacked! Let’s just go to the before-and-afters…
Load Times

But wait, there’s more…

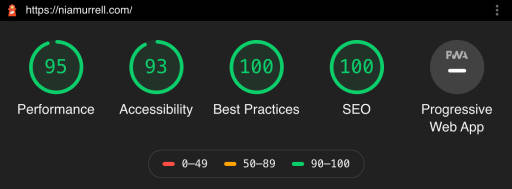
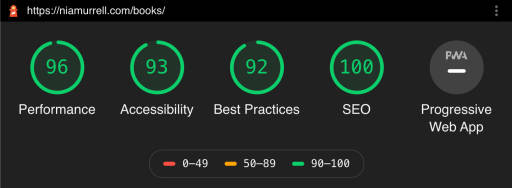
Lighthouse Scores
But it’s not just file size that’s important. I also ran Lighthouse reports on the old sites compared to the new to check things like accessibility, SEO, and best practices.

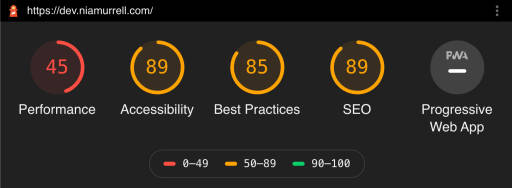
The dev site scores were surprisingly not much better:
The travel posts also improved, even with a lot of images:

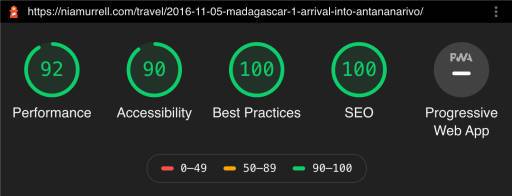
Posts improved compared to dev.niamurrell.com too, especially for mobile devices:


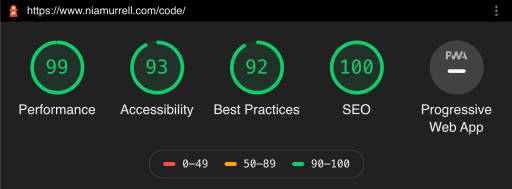
Even the books page with all its images and external JavaScript improved:

From top to bottom, all of the efforts really seem to have paid off!
🥳💃🏾🥳💃🏾🥳💃🏾🥳💃🏾🥳
Future Work
As always, there are still some things I’d like to fix/change/add in the near future, but with less urgency:
- BUG: Search has become unwieldy with the amount of posts I have, so much so that the page is blocked from loading while the index builds. I’ll either replace Lunr, update it, or find another search solution
- I might try my hand at PWAs and make the site available offline
- I want to add a way to easily share my content on social from the post pages, but without adding trackers to my site
- I want to start adding my reading notes about books, and maybe add a vertical for my theatre reviews
- Maybe add comments—I’d be interested to hear if people have feedback about what I’ve written. This is possible with git (the method I prefer) but I haven’t figured out moderation yet.
- Dark mode?
So we’ll see what the future holds!